Embroidery digitizing is the technical art of converting artwork into a stitch file that embroidery machines can read and execute. It’s the bridge between creative vision and physical production — a small error in digitization can result in costly rework, damaged fabrics, failed threads, and frustrated clients.
At Gem Punch, our digitizing team has worked with thousands of designs over 13+ years of production experience. We’ve digitized everything from simple 2-color logos to photorealistic images with 50+ thread colors. We’ve troubleshot every problem imaginable: puckering on jersey fabric, thread breakage on denim, color bleeding, and stitch-outs that don’t match the original design.
This comprehensive guide consolidates a decade of expertise into a definitive reference for anyone who needs to understand, create, or order digitized files.
Table of Contents
- What Is Embroidery Digitizing?
- Why Digitizing Matters
- Digitizing Software & Tools
- The Digitizing Process Step-by-Step
- File Preparation & Artwork Requirements
- Stitch Types, Density & Fabric Matching
- Advanced Techniques
- Common Mistakes & Solutions
- Outsourcing vs. In-House Digitizing
- Quality Assurance & Testing
- Real-World Case Studies
- FAQ: 15 Common Questions
What Is Embroidery Digitizing?
Embroidery digitizing is the process of converting a 2D design (logo, artwork, or image) into a 3D stitch file that embroidery machines can read and execute.
The Problem It Solves
Embroidery machines are mechanical devices that follow precise instructions. They’re incredibly sophisticated, but they can’t “understand” a logo the way humans do. A professional digitizer must:
- Analyze the design — Understand what works in embroidery vs. what doesn’t
- Simplify artwork — Remove unnecessary detail, adjust curves for machine capabilities
- Choose stitch types — Running stitch for outlines, satin stitch for fills, backstitch for detail
- Set stitch density — Too loose = sloppy; too dense = puckering and fabric damage
- Plan color sequence — Order thread changes for production efficiency
- Encode data — Convert all this into machine-readable files (.pes, .exp, .jef, etc.)
What Professional Digitizers Actually Do
Beyond the technical work, professional digitizers simplify artwork intelligently, adapt designs from print to embroidery (different colors, different detail levels), plan thread changes to minimize production time, test designs before full production runs, and optimize files for different machine brands. Each of these steps directly impacts the quality and cost of your final embroidered product.
Learn more: Why US Brands Are Outsourcing Digitizing to Specialized Studios
Why Digitizing Matters
This is the critical truth: Bad digitizing = bad results. Period.
The Real Cost of Poor Digitizing
Broken threads: Machine can’t pull stitches; tension breaks thread repeatedly → production halts.
Puckering fabric: Too many stitches in one area cause fabric to bunch → garment is unusable.
Fuzzy edges: Insufficient stitch density means outline stitches are too far apart → blurry, unprofessional appearance.
Color bleed: Thread shows through to underside of fabric → customer returns.
Stitch-out doesn’t match design: Machine follows a bad digitized file exactly — but it’s wrong → wasted material and wasted labor.
Cost impact: A 500-unit order with bad digitizing can cost $500–$2,000 in rework or scrapped goods. Professional digitizing is not an optional luxury — it’s essential cost control.
The Value of Great Digitizing
Clean, professional stitching. Accurate color reproduction. Durable embroidery that lasts 5–10 years. Fast production with no rework, no thread breaks, no delays. And ultimately, happy customers who place repeat orders and leave positive reviews.
Digitizing Software & Tools
Professional Digitizing Software
Wilcom (Industry Standard) — Price: $3,000–$8,000+. Sophisticated stitch control, automated tracing, AI-assisted density. Steep learning curve, requires formal training. ~40% of professional digitizers use Wilcom.
Janome Digitizer — Price: $300–$2,000. Good balance of power and usability. Moderate learning curve. Best for small to medium businesses and serious hobbyists.
Embird / Hatch — Price: $150–$500. Beginner-friendly with good automation. Low to moderate learning curve. Best for startups, freelancers, and learning digitizers.
Modern AI-Assisted Tools
Auto-digitizing algorithms can convert artwork with minimal manual adjustment, achieving 70–80% accuracy on simple designs. Cloud-based digitizing services offer lower cost at the expense of some control over quality. The honest reality: AI tools are improving but still can’t match expert human digitizers on complex designs. For simple logos (1–4 colors, bold shapes), AI is 80–90% of the way there. For complex artwork, human expertise remains essential.
Critical Digitizing Parameters
Stitch Density — Stitches per square inch. Tight density (4–6 stitches/inch) risks puckering on delicate fabrics. Medium density (2–4 stitches/inch) is standard and versatile. Loose density (1–2 stitches/inch) is for outline work and understitching.
Stitch Length — Distance between individual stitches. Short (1–2mm) for fills and detail. Medium (2–4mm) for standard borders. Long (4–6mm) for backstitching and outlines.
Underlay — Hidden stitches underneath the top layer that stabilize the design, preventing puckering and shifting. Adds stitches (increasing cost and time) but prevents defects. Always worth including.
The Digitizing Process Step-by-Step
Step 1: Client Brief & Artwork Submission (1–2 days)
You provide the design, desired final size, fabric type, color preferences, and any reference examples. The more specific your brief, the better your result. Key information: fabric type (jersey, towel, denim, twill), stitch budget if relevant, and attachment method (sew-on, iron-on, etc.).
Step 2: Artwork Analysis & Simplification (1–2 days)
The digitizer analyzes design suitability, removes fine details that won’t translate to stitching, simplifies curves, consolidates colors (fewer colors = faster, cheaper production), and converts raster images to vector if needed. Example: A photorealistic sunset gets simplified to 3 bold colors (orange, pink, purple) — a design embroidery can execute cleanly.
Vector art guidance: The Benefits of Using High-Quality Vector Art
Step 3: Digitization (2–4 days)
Using software, the digitizer traces outlines and fills with appropriate stitch types, sets stitch density customized for the target fabric, plans thread color order for production efficiency, adds underlay stabilization to prevent puckering, optimizes stitch paths to reduce jump stitches, and tests the design in simulation software. Quality digitizers run 100+ iterations before finalizing.
Step 4: Sampling & Testing (2–5 days)
Before full production, the digitizer runs the design on a sample using the actual production fabric, checks for puckering and thread breakage, measures stitch-out size, and compares to the original design intent. This step is non-negotiable. Cost of sample: $20–50. Cost of rework on 500 units: $500–2,000.
Step 5: Production
Once approved, the design is loaded into production machines and produced at scale. The digitized file becomes the master record for all future orders.
File Preparation & Artwork Requirements
What Makes Good Artwork for Digitizing
Ideal artwork is: Vector format (.ai, .eps, .pdf with vector data), minimum 300 DPI if raster, limited to 2–6 colors, using bold shapes with no lines thinner than 1mm, clear contrast, no gradients (convert to 2–3 flat colors), and not photorealistic raw files.
Avoid: Thin lines (under 1mm, they disappear when stitched), complex gradients, raw photographs without simplification, and text smaller than ¼ inch height.
The Critical Rule: Minimum Text Size
Minimum text size for embroidery readability: ¼ inch height. Below this, letters blend together and become illegible. This is a hard production rule. A logo with “est. 2024” in small text might look sharp at ¼ inch and look like a smudge at ⅛ inch. Always ask: will this be readable when stitched?
File Format Checklist
Before submitting artwork, verify: Is it a vector file (.ai, .eps, or .pdf with vector data)? If raster, is it 300 DPI at final size? Are all fonts converted to outlines? Is the color count 2–6 maximum? Are text sizes minimum ¼ inch? Are line weights minimum 1mm?
Full guide: Top 5 Mistakes to Avoid When Digitizing Logos for Embroidery
Stitch Types, Density & Fabric Matching
Common Stitch Types
Running Stitch: Simple line stitches for outlines and thin lines. Low stitch count, fast production.
Satin Stitch: Parallel stitches that fill areas. Creates smooth, professional appearance. Medium-to-high stitch count.
Fill Stitch: Dense stitching that covers an area completely. Rich appearance, high stitch count.
Backstitch: Double-stitched lines for extra durability and definition. Used for fine detail and small text.
Underlay: Hidden stabilization stitches underneath the top layer — prevents puckering and shifting.
Density Variations by Fabric Type
This is critical. Using the wrong density for a fabric causes real production problems.
| Fabric Type | Typical Density | Key Consideration |
| Jersey (T-shirts, hoodies) | 2.5–3.5 stitches/inch | Stretchy — lower density required to prevent puckering |
| Towel | 3–4 stitches/inch | Thick, absorbent — handles higher density without puckering |
| Denim / Heavy Twill | 3.5–4.5 stitches/inch | Dense, strong — higher density possible, very durable result |
| Uniforms (Poly/Cotton blend) | 2.5–3.5 stitches/inch | Standard, versatile — works well for most designs |
| Linen, Silk, Delicate fabrics | 2–3 stitches/inch | Special handling required — expert digitizer recommended |
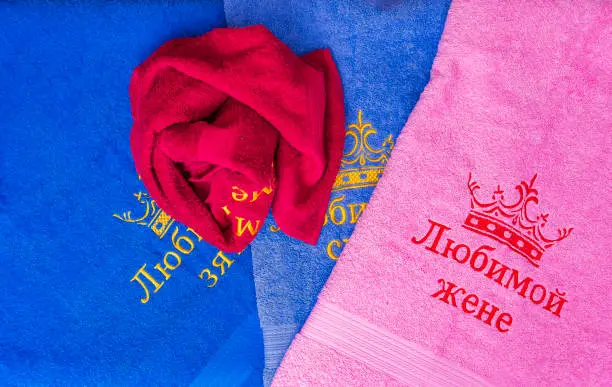
Learn the specifics: Towel vs. Uniform Digitizing: Key Differences
Advanced Techniques
3D Puff Digitizing
Puff creates raised, dimensional stitching by stitching on top of special foam or filling material. Result: an eye-catching 3D effect that pops off the garment. Best for hoodies, caps, and streetwear applications. Cost: 30–50% premium over standard digitizing. One streetwear brand that added puff to their hoodies saw sales increase 23% — the 3D effect was that distinctive.
See: 3D Puff Digitizing: Why It’s the #1 Trend for Hoodies & Caps
Photorealistic / Split-Stitch Digitizing
Converts photographs into embroidery using layered colors and precise stitch angles. The digitizer analyzes a photo’s color gradations and recreates them using multiple thread colors and stitch angle changes. Results can be stunning. Cost: Very high ($500–$5,000+ per design) — this is expert territory. Sports memorabilia companies use this for embroidered player portraits, retailing at $150–$400 per item.
Appliqué Digitizing
Combines fabric pieces with embroidery — large shapes are created as fabric appliqué, with details embroidered on top. Reduces stitch count by 40–60% vs. full embroidery, making it faster and significantly cheaper for large logos or cost-sensitive bulk orders.
Color Blending with Stitch Direction
By changing stitch angles, digitizers can create subtle color transitions without multiple thread colors — an optical illusion that makes 2 thread colors look like 4–5. A powerful technique for creating rich-looking designs at a lower cost.
Common Mistakes & Solutions
Mistake #1: Too Much Detail in Design
Problem: Client submits logo with fine lines and small text.
Result: Details blur, text becomes unreadable, fabric puckers.
Solution: Simplify before digitizing. Remove fine lines, use minimum ¼ inch text, reduce to 2–6 colors.
Mistake #2: Incorrect Stitch Density for Fabric
Problem: Using towel density on jersey (or vice versa).
Result: Either puckering and thread breaks, or weak sloppy-looking stitches.
Solution: Always tell your digitizer the production fabric. Customize density per fabric type.
Mistake #3: Poor Thread Color Order
Problem: Planning color changes randomly without optimization.
Result: Excessive thread trimming, production delays, higher labor costs.
Solution: Organize colors logically — similar colors together, minimize transitions.
Mistake #4: No Sample Testing
Problem: Producing 1,000 patches without testing the digitized file first.
Result: Discover a defect too late — all 1,000 are flawed.
Solution: Always run a sample before full production. Cost: $20–50. Rework cost: $500–2,000. The math is obvious.
Mistake #5: Using Raster Files (JPEG/PNG)
Problem: Client provides logo as a low-res JPEG. Digitizer uses auto-trace.
Result: Pixelated, blurry stitches that don’t match the original.
Solution: Vector files only. Have JPEG vectorized first ($50–300) before digitizing.
Mistake #6: Ignoring Fabric Characteristics
Problem: Using uniform density regardless of fabric type.
Result: Neither looks professional. One puckers, one looks weak.
Solution: Customize digitizing by fabric. Never use a one-size-fits-all approach.
Full guide: Top 5 Mistakes to Avoid When Digitizing Logos for Embroidery
Outsourcing vs. In-House Digitizing
When to Digitize In-House
Pros: Complete control over quality and timeline, no vendor dependency, ability to iterate quickly, designs stay proprietary.
Cons: Software costs $1,000–$8,000+ plus formal training costs ($500–$2,000). Each complex design takes 4–8 hours of your time. Mistakes are entirely your cost. Steep learning curve. Machine compatibility headaches.
Best for: High-volume producers (100+ designs/year), embroidery shops with existing expertise, large corporations with internal teams.
When to Outsource Digitizing
Pros: Access to expert digitizers with years of experience. Fast 24–48 hour turnaround. Zero software investment. Risk transfer — the vendor is accountable for quality. Supports multiple machine formats (.pes, .exp, .jef, etc.).
Cons: Less direct control, communication delays, vendor dependency.
Best for: Agencies, startups, businesses with fewer than 20 designs/year, teams without design expertise.
Industry reality: 65% of US apparel brands now outsource digitizing to specialized studios. It’s the norm — not the exception.
Cost Comparison
| Factor | In-House | Outsourcing |
| Upfront investment | $3,000–$8,000+ software | $0 |
| Training | $500–$2,000 | $0 |
| Per-design cost | $50–$150 (labor) | $50–$300 |
| Turnaround | 4–8 hours your time | 24–48 hours |
| Break-even | ~100+ designs/year | Always efficient for low volume |
Read: Why US Brands Are Outsourcing Digitizing to Specialized Studios | Budget-Friendly Digitizing Services: How to Choose
Quality Assurance & Testing
What Professional Digitizers Check
Before releasing a file, professional digitizers verify: appropriate stitch count for design size and fabric, thread tension compatibility (no breaks), optimized color sequence, adequate underlay coverage, correct file format for the intended machine, pull compensation for fabric stretch, solid edge density (no gaps), and secure tie-down anchors.
Pre-Production Checklist
Before committing to 500–1,000 unit production, run through these checks on a physical sample: stitching is clean with no thread breaks, fabric lies flat with no puckering, thread colors match design intent, finished size matches desired dimensions, file format works on your machine, thread tension is correct, edges are crisp and solid, and the design holds up after a wash test.
Real-World Case Studies
Case Study #1: Retail Chain — Digitizing Disaster Averted
Client: Retail chain, 200 employees, 5 locations
Challenge: Submitted a 72 DPI JPEG logo for embroidery on uniforms. Wanted 500 patches immediately.
Problem Identified: Auto-digitizing from the JPEG would produce blurry, pixelated stitches.
Solution: Gem Punch recommended vectorizing the JPEG first ($150), then digitizing. Added 3 days but prevented a production disaster.
Results: Vectorized logo produced clean, crisp lines. Digitized file was professional quality. Sample tested perfectly. All 500 patches produced with zero defects. Cost savings: $150 vectorization vs. $2,000+ rework on bad patches.
Lesson: Don’t skip vectorization if your source file is raster. The upfront cost is always worth it.
Case Study #2: Streetwear Brand — 3D Puff Innovation
Client: Emerging streetwear brand, 5,000 social followers
Challenge: Needed a “wow factor” for a limited-edition hoodie drop. Standard embroidery felt generic.
Solution: Commissioned 3D puff digitizing of brand logo. Cost: $500 (premium for 3D).
Results: Hoodies sold out in 2 weeks (normally takes 4–6). Customer feedback: overwhelmingly positive about the 3D effect. Social posts about the hoodies got 5x typical engagement. Profit margin increased 18% due to premium pricing — the puff justified a higher retail price.
Lesson: Premium digitizing techniques can justify premium pricing and create real market differentiation.
Case Study #3: Corporate — Thread Break Crisis Solved
Client: Corporate uniform supplier, 10,000 unit annual order
Problem: Production machine breaking thread on every 50th patch. The digitized file had density set too high for the jersey fabric — a file that had been in use for 4 years without re-testing.
Solution: Re-digitized with proper density for jersey and modern machine specs.
Results: Zero thread breaks with the new file. Production efficiency increased 30%. Labor savings: $3,000+ immediately. Ongoing annual savings: $1,500–$2,000.
Lesson: Even “working” digitized files can be outdated. Regular re-testing catches expensive problems before they compound.
FAQ: 15 Common Questions About Embroidery Digitizing
Q1: How long does digitizing take?
Simple logo (1–4 colors): 1–2 days. Complex design (5–10 colors): 3–5 days. Photorealistic: 1–2 weeks.
Q2: What file formats do you accept?
Vector (.ai, .eps, .pdf with vector data) is ideal. If raster, minimum 300 DPI at final size. Low-res JPEG/PNG needs vectorization first ($50–300).
Q3: Can I use an old digitized file from 5 years ago?
Maybe, but files should be re-tested regularly. Machine specs and fabric types change. Re-testing via sampling is cheap insurance.
Q4: What’s the ideal stitch count for patches?
Depends on size: 2″ patch = 2,000–4,000 stitches; 4″ patch = 5,000–10,000 stitches. More stitches = higher cost and longer production.
Q5: Can I use the same digitized file on different fabrics?
Not recommended. Density needs adjustment per fabric type. Always customize by fabric — the same file on jersey vs. towel will produce very different results.
Q6: What does “underlay” do?
Underlay stitches stabilize the design, prevent puckering, and prevent shifting during production. They add stitches but prevent defects. Always worth including.
Q7: How much does digitizing cost?
Simple: $50–100. Complex: $200–500. Photorealistic: $500–$5,000. Get quotes from 2–3 vendors before committing.
Q8: Can I make changes after digitizing is done?
Minor changes (colors, slight adjustments): $20–50. Major changes (redesign): might as well re-digitize ($100–300).
Q9: Should I always get a sample before production?
YES. Non-negotiable. Sample cost: $20–50. Rework cost on 500 units: $500–2,000. The ROI is obvious.
Q10: What if the digitized file doesn’t match my original design?
Common and expected. Digitizing simplifies designs. Expected changes include fewer colors, less detail, and adjusted proportions. If the result is drastically different from what was agreed, request a revision.
Q11: Can digitized files be used on different machines?
Each machine brand needs its own format (.pes for Brother, .exp for Melco, .jef for Janome, etc.). Good digitizers provide multiple formats automatically.
Q12: How do I know if a digitizer is good?
Ask for a portfolio of samples they’ve actually produced. Read reviews. Check how they handle revisions. Good digitizers respond quickly and stand behind their work.
Q13: What’s the difference between auto-digitizing and manual?
Auto-digitizing: Software traces design automatically (70–80% quality, faster, cheaper). Manual: Digitizer hand-traces and optimizes (95%+ quality, more expensive). Manual is always better for complex or professional work.
Q14: Can I digitize photographs?
Yes, but they require photorealistic digitizing — expensive and complex. A simpler approach: have the photo simplified to 3–4 flat colors first, then digitize.
Q15: How often should I re-digitize old files?
Every 3–5 years if actively used. Technology improves, machines are upgraded, better techniques become available. Annual re-testing (sampling) catches problems early.
Conclusion
Embroidery digitizing is both art and science. The best digitizers understand design principles, machine mechanics, fabric properties, and production realities. They think beyond the stitch file — they think about the final embroidered product and the customer who will wear it.
Key Takeaways:
- Quality digitizing is the foundation of professional embroidery — don’t cut corners here
- Artwork simplification is critical — complex designs produce poor results
- Stitch density must be matched to fabric type (non-negotiable)
- Always test samples before full production
- Outsourcing digitizing is now standard industry practice (65% of brands do it)
- Professional digitizers save time, money, and headaches
Ready to digitize your designs? Get professional digitizing services from Gem Punch — our team brings 13+ years of experience, thousands of completed designs, and a 100% production success commitment.
Related Posts
Fundamentals:
Top 5 Mistakes to Avoid When Digitizing | How to Turn Your Logo into a Custom Patch | How Custom Patches Are Made
Techniques & Fabric-Specific:
3D Puff Digitizing: The #1 2025 Trend | Towel vs. Uniform Digitizing | Why Your Embroidery Thread Breaks
Professional Services:
Why Brands Outsource Digitizing | Budget-Friendly Digitizing Services
Design Preparation:
High-Quality Vector Art Benefits | Embroidered Logos for Company Uniforms