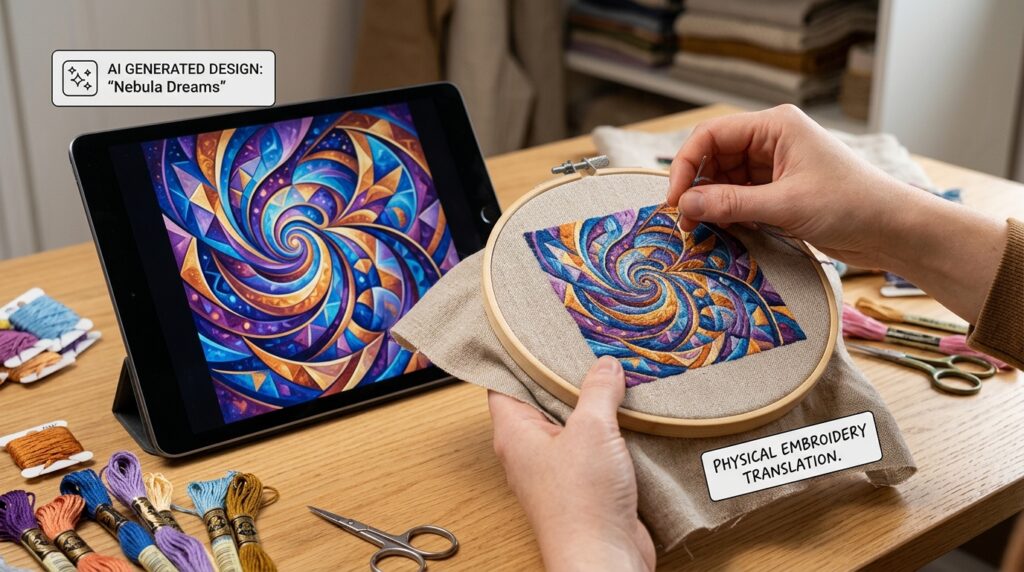
Artificial intelligence can generate stunning artwork in seconds. Detailed animals, complex logos, realistic textures, and intricate patch concepts are now easier to create than ever before.
Artwork that looks perfect on a screen is often not suitable for embroidery digitizing without significant modifications.
Embroidery is not a printing process. Every design must be recreated using physical thread, fabric, and machine stitches on your actual garment or patch. This introduces hard technical limitations that frequently require AI artwork to be simplified, modified, or completely redesigned before professional digitizing.
Understanding these limitations will help you create better AI-generated designs, reduce expensive revisions, avoid common digitizing mistakes, and achieve professional-quality embroidered results on the first try.
The AI Artwork Problem: Why Your Embroidery Design Looks Different
If you’ve ever submitted AI-generated artwork for embroidery digitizing, you’ve likely experienced this frustration:
✗ “Why doesn’t my embroidery file look exactly like the AI image?”
✗ “Why were some details removed or simplified?”
✗ “Why do the colors look completely different?”
✗ “Why can’t all the fine details fit on a hat or small patch?”
✗ “Why can’t I just use my AI artwork directly for embroidery?”
The answer is simple but important:
AI artwork is created for digital screens. Embroidery designs are created with physical thread on fabric.
These are fundamentally different mediums with completely different technical capabilities and limitations. What looks absolutely perfect on your computer screen may be impossible to reproduce accurately with thread stitches.
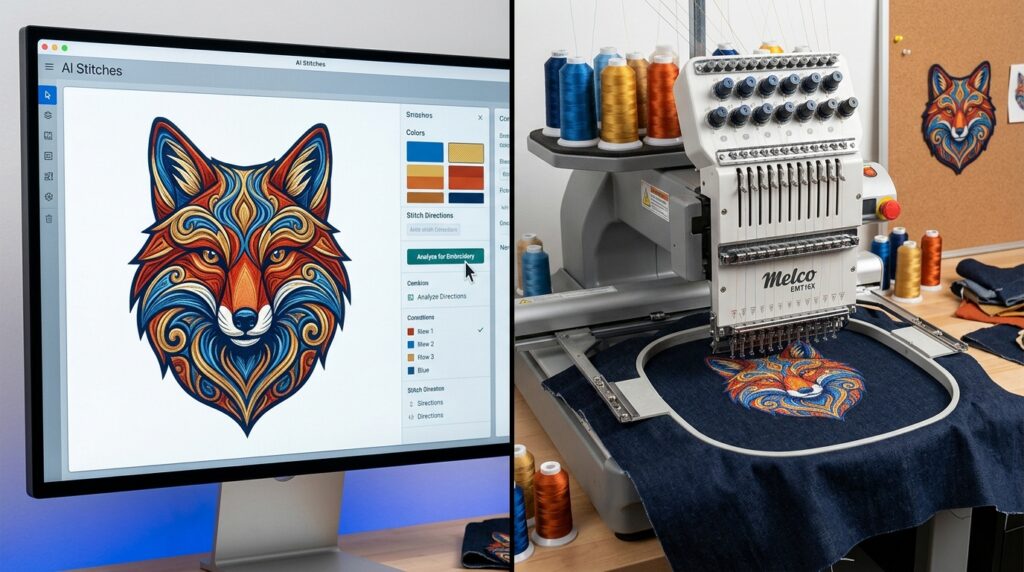
How Embroidery Digitizing Works (And Why AI Art Needs Modification)
From Pixels to Stitches: The Conversion Process
When you view AI-generated artwork on a screen, every pixel contains unlimited detail, smooth gradients, realistic shadows, complex textures, and countless color variations.
Embroidery machines don’t work that way.
Before AI artwork can become an embroidered design, a professional digitizer must convert your image into thousands of individual stitch commands that tell the embroidery machine:
- Where each stitch should be placed
- Which direction each stitch should run
- How dense the stitching should be (stitch density)
- When thread colors should change
- What stitch type to use (satin, fill, backstitch, etc.)
- How to handle curves, angles, and transitions
Why You Can’t Just “Convert” AI Art to Embroidery
This is the critical misunderstanding that leads to failed embroidery projects:
You cannot simply convert an AI image into embroidery stitches the way you’d print an image to paper.
A printer can reproduce any pixel from your digital file. An embroidery machine cannot.
Every element of your AI design must be manually translated into thread by a skilled digitizer who understands:
- Embroidery machine capabilities and limitations
- Fabric types and how they affect stitching
- Thread color matching and color theory
- Stitch density optimization for different materials
- How designs will look when worn on actual garments or patches
The goal of embroidery digitizing is NOT to recreate every pixel of your AI artwork. The goal is to create a design that:
- Sews cleanly and professionally
- Looks sharp and intentional on fabric
- Performs well across different embroidery machines
- Works at your intended size
- Maintains the spirit and essence of your original design
When you understand this distinction, you understand why AI artwork almost always requires modification before professional digitizing.
The 5 Biggest Problems With AI Artwork for Embroidery
Problem #1: Too Much Detail (The Complexity Issue)
The issue: AI artwork often includes incredibly fine details—tiny textures, intricate backgrounds, delicate shadows, and elaborate patterns that look amazing on screen but become unreadable disasters when stitched.
Why it happens: AI is trained to maximize visual complexity and realism. When you ask for “detailed,” “photorealistic,” or “intricate” artwork, AI delivers. But embroidery doesn’t reward detail—it rewards clarity.
What happens when you try: Fine details become thick blobs of thread. Thin lines merge together. The finished embroidery looks muddy and unclear instead of sharp and professional.
The solution: Simplify your AI prompt. Request “bold shapes,” “clean outlines,” and “minimal fine detail” instead of photorealism.
Problem #2: Text That’s Too Small (The Readability Crisis)
The issue: Text below 1/4″ (0.25 inches) in height becomes unreadable when embroidered. Yet AI artwork commonly includes tiny lettering, small copyright marks, and decorative text that looks perfect on screen.
Why it happens: On a screen, text can be infinitely small and still be readable. Embroidery doesn’t scale that way—thread has physical thickness.
What happens when you try: Small text becomes an illegible blob of stitches. Letters merge together. The text disappears or becomes confusing.
The solution: Specify minimum text size in your AI prompt: “Large readable text, minimum 1/4 inch height, bold sans-serif font, no serifs.”
Problem #3: Thin Lines & Outlines (The Fragility Problem)
The issue: AI artwork frequently includes thin, delicate outlines and fine line work that looks elegant on screen but won’t embroider properly.
Why it happens: Digital art can have 1-pixel-thick lines. Thread can’t replicate that fineness—stitches have minimum thickness.
What happens when you try: Thin lines disappear entirely or become distorted. Delicate outlines become thick and clumsy. The design loses its intended elegance.
The solution: Request “bold outlines” and “strong contrast” in your AI prompt. Ensure all lines are thick enough to survive the embroidery conversion.
Problem #4: Unlimited Colors (The Thread Limitation)
The issue: AI artwork uses unlimited digital colors. Your computer can display millions of color variations in a single design. Embroidery machines cannot.
Why it happens: A sunset might contain 15+ subtle color variations. A realistic animal might have 10+ different shades of brown. Digital displays can show all of these simultaneously.
How embroidery machines work: A single-needle machine holds ONE thread color at a time. Multi-needle machines hold 6-15 colors (sometimes up to 20). Even with multiple needles, each color change takes time and adds complexity.
What happens when you try: Professional digitizers must reduce your 20+ color variations down to 6-12 thread colors. Colors look simplified, less photorealistic, and sometimes inaccurate.
Why it matters: Each extra color adds:
- More production time
- Higher costs for the customer
- More thread changes (and potential errors)
- Greater complexity for the embroidery machine
The solution: Generate AI artwork with a limited color palette from the start. Prompt: “Limited color palette, maximum 8 colors, use primary colors only, avoid gradients and subtle shading.”
Problem #5: Design Size Incompatibility (The Scaling Nightmare)
The issue: AI artwork created at large sizes doesn’t work when scaled down. A detailed design that looks great as a large back patch becomes an illegible mess when reduced to fit a 2″ cap or left chest logo.
Why it matters: Common embroidery placements have strict size limitations:
- Cap/hat embroidery: 2-3 inches maximum
- Left chest logo: 3-4 inches typical
- Polo shirt front: 3-5 inches typical
- Jacket front: 4-6 inches typical
- Small patch: 2-3 inches common
What happens: When you shrink a detailed AI design to fit these spaces, fine lines become invisible, small text disappears, and color details merge into muddy blobs.
The solution: Design AI artwork with your final embroidery size in mind from the beginning. Smaller designs need simpler artwork.
What Is “Embroidery-Ready” AI Artwork?
Embroidery-ready artwork is AI-generated design that has been created specifically with embroidery digitizing in mind. It’s artwork prepared to be cleanly, professionally, and accurately recreated using thread stitches.
A design may look stunning as digital art, but that doesn’t automatically mean it will digitize beautifully or stitch cleanly on fabric. Embroidery-ready artwork removes, simplifies, or modifies the elements that would become messy, unreadable, or too delicate when converted to embroidery stitches.
Characteristics of Embroidery-Ready AI Artwork
✓ Clean, bold outlines — Strong, visible edges (not thin or delicate)
✓ Solid color areas — Flat colors, not gradients or realistic shading
✓ Readable text — Large minimum 1/4″ height, bold sans-serif fonts
✓ Simple shapes — Clear geometric forms, not overly complex
✓ Adequate spacing — Room between design elements for thread
✓ Thick enough lines — All lines visible and reproducible with stitches
✓ Size-appropriate details — Details match your final embroidery size
✓ Minimal special effects — No glowing edges, realistic shadows, tiny textures, or photo effects
✓ Strong contrast — Clear visual separation between elements
✓ Limited color palette — 6-12 colors maximum, not 20+
What Changes During Professional Embroidery Digitizing
When your AI artwork reaches a professional digitizer, several modifications typically occur:
- Glowing edges → Removed or converted to clean outlines
- Realistic shadows and gradients → Simplified to solid thread colors
- Tiny textures and details → Removed or enlarged
- Thin outlines → Thickened for embroidery reproduction
- Unlimited colors → Reduced to 6-15 thread colors
- Fine line work → Simplified to bold strokes
- Delicate backgrounds → Removed or drastically simplified
This is not a failure of digitizing. This is the necessary translation between two different mediums.
The goal is to preserve the essence and spirit of your design while creating an embroidery file that looks professional, stitches cleanly, and performs well on actual fabric.
How to Create Embroidery-Friendly AI Artwork (Step-by-Step)
If you’re generating AI artwork specifically for embroidery digitizing, follow these guidelines:
Step 1: Use Embroidery-Specific AI Prompts
Instead of generic prompts, include embroidery-specific instructions:
Poor prompt: “Create a detailed logo with realistic shading and complex textures”
Better prompt: “Create a bold embroidery patch design with clean outlines, limited colors, readable text, and simple shapes. Make it suitable for embroidery digitizing.”
Best prompt: “Embroidery patch design: bold outlines, maximum 8 colors, clean shapes, large readable text minimum 1/4 inch, strong contrast, minimal detail, suitable for 3-inch patch size”
Step 2: Design for Your Intended Size
Consider where and how your embroidery will be used:
For small designs (2-3 inches): Request simple, bold, minimal-detail artwork
For medium designs (4-6 inches): Request moderate detail, bold outlines, clean shapes
For large designs (6+ inches): More detail is acceptable, but keep it clean
Step 3: Limit Your Color Palette
Request artwork with a specific number of colors:
“Limited color palette: Use only 6-8 colors maximum. Choose primary colors that contrast well. Avoid subtle gradients, shading, and blended colors.”
Step 4: Prioritize Readability
If your design includes text:
“Large, bold, readable text: Minimum 1/4 inch height. Use bold sans-serif fonts only. Ensure strong contrast between text and background. No script fonts or serifs.”
Step 5: Request Bold, Clean Elements
Emphasize simplicity and clarity:
“Bold shapes, clean outlines, strong contrast, minimal fine detail, no thin lines, no glowing effects, no realistic shading.”
Common AI-to-Embroidery Mistakes (And How to Avoid Them)
Mistake #1: Trusting That AI Artwork Will Digitize “As-Is”
Reality: Almost all AI artwork requires modification before professional digitizing. Plan for this.
Solution: Budget for digitizer consultation and potential design revisions. Ask your digitizer to recommend simplifications before starting work.
Mistake #2: Requesting Maximum Detail and Complexity
Reality: “Detailed” and “photorealistic” AI artwork almost never digitizes well.
Solution: Request simple, bold designs. Details can be added back manually if needed, but removing complex details is harder and more expensive.
Mistake #3: Using Unlimited Colors Without Thought
Reality: Each color in your AI design requires a thread change during embroidery. More colors = higher cost, longer production time, more complexity.
Solution: Limit colors from the start. Ask AI to generate artwork with 6-8 colors maximum.
Mistake #4: Scaling Large Designs Down Without Simplification
Reality: A detailed 10-inch design doesn’t work at 2 inches.
Solution: Design AI artwork at your actual embroidery size from the beginning.
Mistake #5: Ignoring Embroidery Limitations Entirely
Reality: Embroidery is not a printing process. It has real physical limitations.
Solution: Research embroidery design requirements before creating AI artwork. Understand what does and doesn’t work.
AI Artwork for Embroidery: A Practical Example
Let’s say you want a custom patch with an eagle design.
Your first AI prompt (not embroidery-friendly): “Create a photorealistic, detailed eagle with realistic feathers, complex shading, realistic eyes, and intricate background scenery. Maximum detail. 4K quality.”
Result: 15+ colors, countless fine details, thin lines, complex shadows. Requires extensive modification before digitizing. Expensive. Disappointing final result.
Your revised AI prompt (embroidery-friendly): “Create an embroidery patch design: Bold eagle design with clean outlines, simple shapes, strong contrast. Limited color palette: brown, tan, white, black only (4 colors maximum). Large readable wing details. Bold facial features. Clean background. Suitable for 3-inch embroidered patch. No realistic shading or fine textures.”
Result: Clean, simple design. Requires minimal modification. Professional digitizing. Happy customer. Lower cost.
The difference? The second design respects embroidery limitations from the start.
Frequently Asked Questions About AI Artwork and Embroidery Digitizing
Can I use any AI artwork for embroidery?
Technically yes, but most AI artwork will require significant modification before professional digitizing. AI artwork specifically created for embroidery works much better and requires fewer revisions.
Will my AI design look exactly like the original after embroidery digitizing?
Rarely. Professional digitizers must simplify, remove, or modify elements that can’t be cleanly reproduced with thread. The goal is to preserve the essence of the design while creating something that stitches beautifully.
How much will my AI artwork need to be changed?
It depends on the artwork. Simple, bold designs with limited colors require minimal changes. Detailed, photorealistic designs with complex colors and fine details require extensive modifications.
Can I provide my own AI artwork and have it digitized without changes?
Possibly, if your AI artwork was created with embroidery in mind. If it was created for general digital use, expect your digitizer to recommend modifications.
What’s the best way to generate AI artwork for embroidery?
Use prompts that request embroidery-specific characteristics: bold outlines, clean shapes, limited colors, readable text, minimal detail, and strong contrast.
Will detailed AI artwork cost more to digitize?
Yes. Complex artwork with many colors, fine details, and intricate elements requires more digitizer time and expertise. Simple artwork digitizes faster and costs less.
Should I simplify my AI artwork myself or let the digitizer do it?
Have a professional digitizer evaluate your artwork. They understand embroidery limitations and can recommend the best simplifications. But creating embroidery-friendly artwork from the start saves time and money.
Getting Professional Help: Gem Punch’s AI-to-Embroidery Solution
AI-generated artwork is a fantastic starting point for embroidery design. But it usually needs professional expertise to become a digitizing-ready file.
That’s where professional embroidery digitizing comes in.
At Gem Punch, our expert digitizers work with AI artwork every single day. We:
✓ Evaluate your AI design for embroidery feasibility
✓ Recommend simplifications that improve stitching results
✓ Simplify and modify your artwork for professional embroidery
✓ Convert to production-ready files that stitch beautifully
✓ Provide digital proofs before you commit to production
✓ Include unlimited revisions until you’re completely satisfied
✓ Test on your actual fabric to ensure quality
Whether your AI artwork needs minor tweaks or major revision, our digitizers know exactly how to translate your design into professional-quality embroidery.
Get Professional Embroidery Digitizing for Your AI Artwork →
The Bottom Line: AI Artwork + Professional Digitizing = Success
Artificial intelligence is an amazing tool for creating patch and embroidery design concepts. AI artwork can inspire, guide, and accelerate your creative process.
But AI artwork is a starting point, not a finished embroidery file.
Between your AI design and your finished embroidered patches or apparel, you need professional digitizing expertise. This expertise:
- Translates digital art to thread
- Simplifies complexity appropriately
- Optimizes for your specific fabric and size
- Ensures professional quality
- Prevents costly mistakes
The best embroidery designs are not always the most detailed. They’re the ones that look clear, balanced, and beautiful when stitched on actual fabric.
If you have AI-generated artwork and want to explore embroidery options, submit your design for a free professional digitizing consultation. Our team will review your artwork, recommend simplifications if needed, and provide accurate pricing for converting your AI art into professional-quality embroidery.
Related Resources & Blog Posts
- Complete Guide to Embroidery Digitizing — Everything you need to know about the digitizing process
- 10 Common Embroidery Digitizing Mistakes — Avoid expensive errors
- Custom Patches Service — Once digitized, order your custom embroidered patches